This is a mirror page, please see the original page:
https://xmake.io/#/zh-cn/plugin/builtin_plugins生成IDE工程文件
简介
XMake跟cmake, premake等其他一些构建工具的区别在于:
!> xmake默认是直接构建运行的,生成第三方的IDE的工程文件仅仅作为插件来提供。
这样做的一个好处是:插件更加容易扩展,维护也更加独立和方便。
生成Makefile
$ xmake project -k makefile
生成CMakelists.txt
$ xmake project -k cmakelists
生成build.ninja
!> 2.3.1以上版本才支持
$ xmake project -k ninja
生成compiler_flags
$ xmake project -k compiler_flags
生成compile_commands
导出每个源文件的编译信息,生成基于clang的编译数据库文件,json格式,可用于跟ide,编辑器,静态分析工具进行交互。
$ xmake project -k compile_commands
输出的内容格式如下:
[
  { "directory": "/home/user/llvm/build",
    "command": "/usr/bin/clang++ -Irelative -DSOMEDEF=\"With spaces, quotes and \\-es.\" -c -o file.o file.cc",
    "file": "file.cc" },
  ...
]
对于compile_commands的详细说明见:JSONCompilationDatabase
生成Xcode工程文件
目前,我们还没有时间去自己实现xcode工程的生成,但不代表不支持,因为xmake支持生成cmakelists.txt文件,而cmake是支持xcode工程文件生成的,在官方还没有实现之前,
我们也可以通过cmake变相支持它,xmake会自动内部调用cmake中转下生成结果,对用户而言使用上没啥区别,只需要确保cmake已经安装即可:
$ xmake project -k xcode
!> 等之后有时间,我们会重新自己实现各更加完善的xcode输出插件,也欢迎大家帮忙贡献。
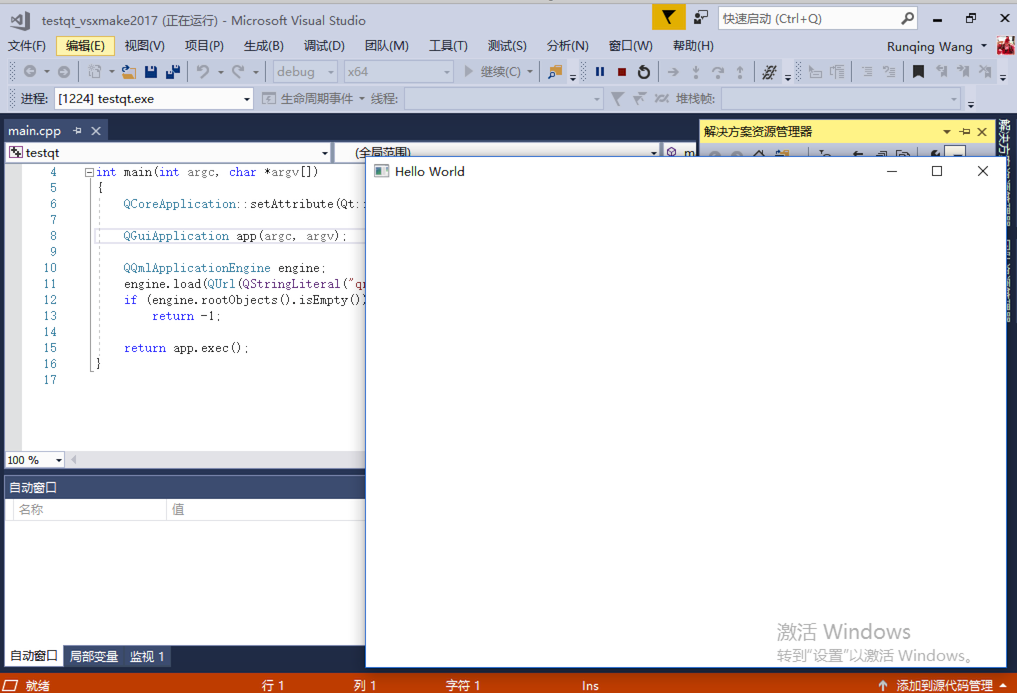
生成VisualStudio工程
使用xmake集成编译
v2.2.8以上版本,提供了新版本的vs工程生成插件扩展,跟之前的生成vs的插件处理模式上有很大的不同,之前生成的vs工程是把所有文件的编译展开后,转交给vs来处理编译。
但是这种模式,对xmake的rules是没法支持的。因为xmake的rules里面用了很多的on_build此类自定义脚本,无法展开,所以像qt, wdk此类的项目就没法支持导出到vs里面进行编译了。
因此,为了解决这个问题,新版本的vs生成插件通过在vs下直接调用xmake命令,去执行编译操作,并且对intellsence和定义跳转,还有断点调试也做了支持。
具体使用方式跟老版本类似:
$ xmake project -k [vsxmake2010|vsxmake2013|vsxmake2015|..] -m "debug;release"
如果没指明版本,那么xmake会自动探测当前已有的vs版本来生成:
$ xmake project -k vsxmake -m "debug,release"
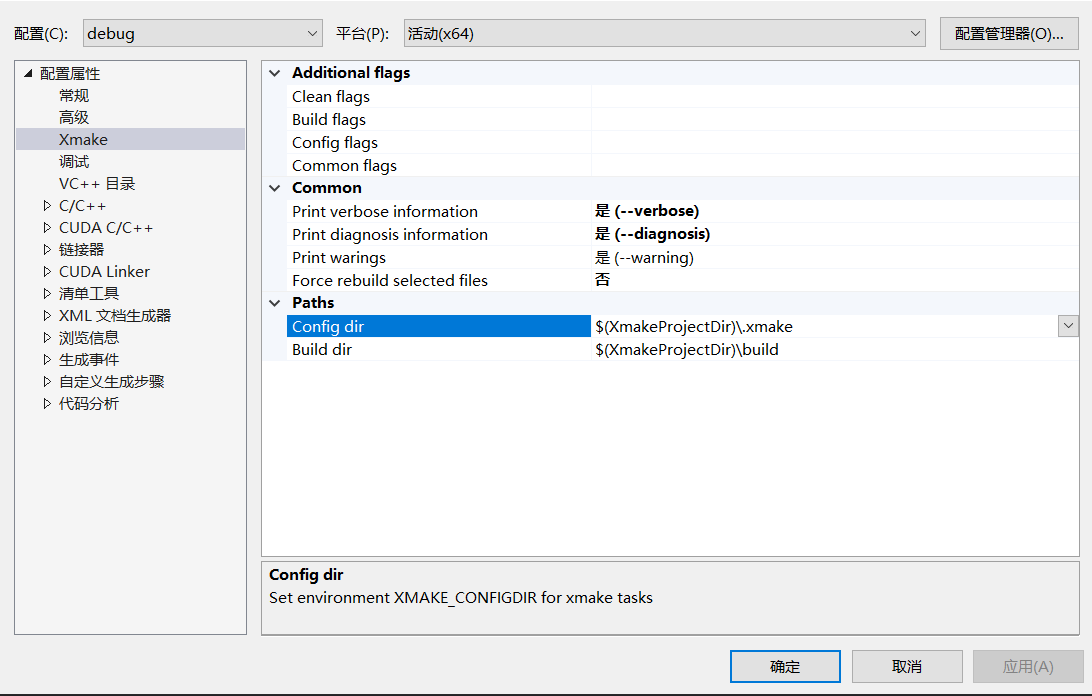
另外,vsxmake插件还会额外生成一个自定义的配置属性页,用于在vs里面,方便灵活的修改和追加一些xmake编译配置,甚至可以在里面配置切换到其他交叉工具链,实现在vs中对android, linux等其他平台的交叉编译。
v2.5.1 版本提供了一个 add_rules("plugin.vsxmake.autoupdate") 规则,如果应用此规则,生产的vs工程在编译完成后,会检测 xmake.lua 和代码文件列表的改动,如果有变化,就会自动更新 vs 工程。
add_rules("plugin.vsxmake.autoupdate")
target("test")
    set_kind("binary")
    add_files("src/*.c")
另外,我们可以通过 set_group 接口对每个 target 设置分组,使得生成的 vs 工程可以按指定结构进行分组。更多详情见:issue 1026
使用vs内置编译机制
!> 建议尽量使用上文提到的v2.2.8之后提供的新版的vs生成插件,支持更加完善,此处的生成方式不支持xmake的rules,以及对qt等工程的生成。
$ xmake project -k [vs2008|vs2013|vs2015|..]
v2.1.2以上版本,增强了vs201x版本工程的生成,支持多模式+多架构生成,生成的时候只需要指定:
$ xmake project -k vs2017 -m "debug,release"
生成后的工程文件,同时支持debug|x86, debug|x64, release|x86, release|x64四种配置模式。
如果不想每次生成的时候,指定模式,可以把模式配置加到xmake.lua的中,例如:
-- 配置当前的工程,支持哪些编译模式
add_rules("mode.debug", "mode.release")
另外,我们可以通过 set_group 接口对每个 target 设置分组,使得生成的 vs 工程可以按指定结构进行分组。更多详情见:issue 1026
运行自定义lua脚本
这个跟宏脚本类似,只是省去了导入导出操作,直接指定lua脚本来加载运行,这对于想要快速测试一些接口模块,验证自己的某些思路,都是一个不错的方式。
运行指定的脚本文件
我们先写个简单的lua脚本:
function main()
    print("hello xmake!")
end
然后直接运行它就行了:
$ xmake lua /tmp/test.lua
当然,你也可以像宏脚本那样,使用import接口导入扩展模块,实现复杂的功能。
运行内置的脚本命令
你可以运行 xmake lua -l 来列举所有内置的脚本名,例如:
$ xmake lua -l
scripts:
    cat
    cp
    echo
    versioninfo
    ...
并且运行它们:
$ xmake lua cat ~/file.txt
$ xmake lua echo "hello xmake"
$ xmake lua cp /tmp/file /tmp/file2
$ xmake lua versioninfo
运行交互命令 (REPL)
有时候在交互模式下,运行命令更加的方便测试和验证一些模块和api,也更加的灵活,不需要再去额外写一个脚本文件来加载。
我们先看下,如何进入交互模式:
# 不带任何参数执行,就可以进入
$ xmake lua
>

# 进行表达式计算
> 1 + 2
3

# 赋值和打印变量值
> a = 1
> a
1

# 多行输入和执行
> for _, v in pairs({1, 2, 3}) do
>> print(v)
>> end
1
2
3
我们也能够通过 import 来导入扩展模块:
> task = import("core.project.task")
> task.run("hello")
hello xmake!
如果要中途取消多行输入,只需要输入字符:q 就行了
> for _, v in ipairs({1, 2}) do
>> print(v)
>> q             <--  取消多行输入,清空先前的输入数据
> 1 + 2
3
显示指定信息和列表
显示xmake自身和当前项目的基础信息
$ xmake show
The information of xmake:
    version: 2.3.3+202006011009
    host: macosx/x86_64
    programdir: /Users/ruki/.local/share/xmake
    programfile: /Users/ruki/.local/bin/xmake
    globaldir: /Users/ruki/.xmake
    tmpdir: /var/folders/32/w9cz0y_14hs19lkbs6v6_fm80000gn/T/.xmake501/200603
    workingdir: /Users/ruki/projects/personal/tbox
    packagedir: /Users/ruki/.xmake/packages
    packagedir(cache): /Users/ruki/.xmake/cache/packages/2006

The information of project: tbox
    version: 1.6.5
    plat: macosx
    arch: x86_64
    mode: release
    buildir: build
    configdir: /Users/ruki/projects/personal/tbox/.xmake/macosx/x86_64
    projectdir: /Users/ruki/projects/personal/tbox
    projectfile: /Users/ruki/projects/personal/tbox/xmake.lua
显示工具链列表
$ xmake show -l toolchains
xcode         Xcode IDE
vs            VisualStudio IDE
yasm          The Yasm Modular Assembler
clang         A C language family frontend for LLVM
go            Go Programming Language Compiler
dlang         D Programming Language Compiler
sdcc          Small Device C Compiler
cuda          CUDA Toolkit
ndk           Android NDK
rust          Rust Programming Language Compiler
llvm          A collection of modular and reusable compiler and toolchain technologies
cross         Common cross compilation toolchain
nasm          NASM Assembler
gcc           GNU Compiler Collection
mingw         Minimalist GNU for Windows
gnu-rm        GNU Arm Embedded Toolchain
envs          Environment variables toolchain
fasm          Flat Assembler
显示指定 target 配置信息
我们可以用它来快速追溯定位一些特定配置的位置。
$ xmake show -t tbox
The information of target(tbox):
    at: /Users/ruki/projects/personal/tbox/src/tbox/xmake.lua
    kind: static
    targetfile: build/macosx/x86_64/release/libtbox.a
    rules:
      -> mode.release -> ./xmake.lua:26
      -> mode.debug -> ./xmake.lua:26
      -> mode.profile -> ./xmake.lua:26
      -> mode.coverage -> ./xmake.lua:26
      -> utils.install.cmake_importfiles -> ./src/tbox/xmake.lua:15
      -> utils.install.pkgconfig_importfiles -> ./src/tbox/xmake.lua:16
    options:
      -> info -> ./src/tbox/xmake.lua:50
      -> float -> ./src/tbox/xmake.lua:50
      -> wchar -> ./src/tbox/xmake.lua:50
      -> exception -> ./src/tbox/xmake.lua:50
      -> force-utf8 -> ./src/tbox/xmake.lua:50
      -> deprecated -> ./src/tbox/xmake.lua:50
      -> xml -> ./src/tbox/xmake.lua:53
      -> zip -> ./src/tbox/xmake.lua:53
      -> hash -> ./src/tbox/xmake.lua:53
      -> regex -> ./src/tbox/xmake.lua:53
      -> coroutine -> ./src/tbox/xmake.lua:53
      -> object -> ./src/tbox/xmake.lua:53
      -> charset -> ./src/tbox/xmake.lua:53
      -> database -> ./src/tbox/xmake.lua:53
    packages:
      -> mbedtls -> ./src/tbox/xmake.lua:43
      -> polarssl -> ./src/tbox/xmake.lua:43
      -> openssl -> ./src/tbox/xmake.lua:43
      -> pcre2 -> ./src/tbox/xmake.lua:43
      -> pcre -> ./src/tbox/xmake.lua:43
      -> zlib -> ./src/tbox/xmake.lua:43
      -> mysql -> ./src/tbox/xmake.lua:43
      -> sqlite3 -> ./src/tbox/xmake.lua:43
    links:
      -> pthread -> option(__keyword_thread_local) -> @programdir/includes/check_csnippets.lua:100
    syslinks:
      -> pthread -> ./xmake.lua:71
      -> dl -> ./xmake.lua:71
      -> m -> ./xmake.lua:71
      -> c -> ./xmake.lua:71
    defines:
      -> __tb_small__ -> ./xmake.lua:42
      -> __tb_prefix__="tbox" -> ./src/tbox/xmake.lua:19
      -> _GNU_SOURCE=1 -> option(__systemv_semget) -> @programdir/includes/check_cfuncs.lua:104
    cxflags:
      -> -Wno-error=deprecated-declarations -> ./xmake.lua:22
      -> -fno-strict-aliasing -> ./xmake.lua:22
      -> -Wno-error=expansion-to-defined -> ./xmake.lua:22
      -> -fno-stack-protector -> ./xmake.lua:51
    frameworks:
      -> CoreFoundation -> ./src/tbox/xmake.lua:38
      -> CoreServices -> ./src/tbox/xmake.lua:38
    mxflags:
      -> -Wno-error=deprecated-declarations -> ./xmake.lua:23
      -> -fno-strict-aliasing -> ./xmake.lua:23
      -> -Wno-error=expansion-to-defined -> ./xmake.lua:23
    includedirs:
      -> src -> ./src/tbox/xmake.lua:26
      -> build/macosx/x86_64/release -> ./src/tbox/xmake.lua:27
    headerfiles:
      -> src/(tbox/**.h)|**/impl/**.h -> ./src/tbox/xmake.lua:30
      -> src/(tbox/prefix/**/prefix.S) -> ./src/tbox/xmake.lua:31
      -> src/(tbox/math/impl/*.h) -> ./src/tbox/xmake.lua:32
      -> src/(tbox/utils/impl/*.h) -> ./src/tbox/xmake.lua:33
      -> build/macosx/x86_64/release/tbox.config.h -> ./src/tbox/xmake.lua:34
    files:
      -> src/tbox/*.c -> ./src/tbox/xmake.lua:56
      -> src/tbox/hash/bkdr.c -> ./src/tbox/xmake.lua:57
      -> src/tbox/hash/fnv32.c -> ./src/tbox/xmake.lua:57
      -> src/tbox/hash/adler32.c -> ./src/tbox/xmake.lua:57
      -> src/tbox/math/**.c -> ./src/tbox/xmake.lua:58
      -> src/tbox/libc/**.c|string/impl/**.c -> ./src/tbox/xmake.lua:59
      -> src/tbox/utils/*.c|option.c -> ./src/tbox/xmake.lua:60
      -> src/tbox/prefix/**.c -> ./src/tbox/xmake.lua:61
      -> src/tbox/memory/**.c -> ./src/tbox/xmake.lua:62
      -> src/tbox/string/**.c -> ./src/tbox/xmake.lua:63
      -> src/tbox/stream/**.c|**/charset.c|**/zip.c -> ./src/tbox/xmake.lua:64
      -> src/tbox/network/**.c|impl/ssl/*.c -> ./src/tbox/xmake.lua:65
      -> src/tbox/algorithm/**.c -> ./src/tbox/xmake.lua:66
      -> src/tbox/container/**.c|element/obj.c -> ./src/tbox/xmake.lua:67
      -> src/tbox/libm/impl/libm.c -> ./src/tbox/xmake.lua:68
      -> src/tbox/libm/idivi8.c -> ./src/tbox/xmake.lua:73
      -> src/tbox/libm/ilog2i.c -> ./src/tbox/xmake.lua:70
      -> src/tbox/libm/isqrti.c -> ./src/tbox/xmake.lua:71
      -> src/tbox/libm/isqrti64.c -> ./src/tbox/xmake.lua:72
      -> src/tbox/platform/*.c|context.c|exception.c -> ./src/tbox/xmake.lua:74
      -> src/tbox/platform/impl/*.c|charset.c|poller_fwatcher.c -> ./src/tbox/xmake.lua:74
      -> src/tbox/libm/*.c -> ./src/tbox/xmake.lua:77
    compiler (cc): /usr/bin/xcrun -sdk macosx clang
      -> -Qunused-arguments -target x86_64-apple-macos12.6 -isysroot /Applications/Xcode.app/Contents/Developer/Platforms/MacOSX.platform/Developer/SDKs/MacOSX13.0.sdk
    linker (ar): /usr/bin/xcrun -sdk macosx ar
      -> -cr
    compflags (cc):
      -> -Qunused-arguments -target x86_64-apple-macos12.6 -isysroot /Applications/Xcode.app/Contents/Developer/Platforms/MacOSX.platform/Developer/SDKs/MacOSX13.0.sdk -Wall -Werror -Oz -std=c99 -Isrc -Ibuild/macosx/x86_64/release -D__tb_small__ -D__tb_prefix__=\"tbox\" -D_GNU_SOURCE=1 -framework CoreFoundation -framework CoreServices -Wno-error=deprecated-declarations -fno-strict-aliasing -Wno-error=expansion-to-defined -fno-stack-protector
    linkflags (ar):
      -> -cr
显示内置编译模式列表
$ xmake show -l buildmodes
显示内置编译规则列表
$ xmake show -l rules
显示其他信息
还在完善中,详情见:https://github.com/xmake-io/xmake/issues/798
或者运行:
$ xmake show --help
监视文件更新
v2.7.1 版本新增了 xmake watch 插件命令,可以自动监视项目文件更新,然后触发自动构建,或者运行一些自定义命令。
这通常用于个人开发时候,实现快速的实时增量编译,而不需要每次手动执行编译命令,提高开发效率。
项目更新后自动构建
默认行为就是监视整个项目根目录,任何文件改动都会触发项目的增量编译。
$ xmake watch
watching /private/tmp/test/src/** ..
watching /private/tmp/test/* ..
/private/tmp/test/src/main.cpp modified
[ 25%]: cache compiling.release src/main.cpp
[ 50%]: linking.release test
[100%]: build ok!
监视指定目录
我们也可以监视指定的代码目录,缩小监视范围,提升监视性能。
$ xmake watch -d src
$ xmake watch -d "src;tests/*"
上面的命令,会去递归监视所有子目录,如果想要紧紧监视当前目录下的文件,不进行递归监视,可以使用下面的命令。
$ xmake watch -p src
$ xmake watch -p "src;tests/*"
监视并运行指定命令
如果想在自动构建后,还想自动运行构建的程序,我们可以使用自定义的命令集。
$ xmake watch -c "xmake; xmake run"
上面的命令列表是作为字符串传递,这对于复杂命令参数,需要转义比较繁琐不够灵活,那么我们可以使用下面的方式进行任意命令的设置。
$ xmake watch -- echo hello xmake!
$ xmake watch -- xmake run --help
监视并运行目标程序
尽管我们可以通过自定义命令来实现目标程序的自动运行,但是我们也提供了更加方便的参数来实现这个行为。
$ xmake watch -r
$ xmake watch --run
[100%]: build ok!
hello world!
监视并运行 lua 脚本
我们还可以监视文件更新后,运行指定的 lua 脚本,实现更加灵活复杂的命令定制。
$ xmake watch -s /tmp/test.lua
我们还可以再脚本中获取所有更新的文件路径列表和事件。
function main(events)
    -- TODO handle events
end
分析诊断工程配置和代码
检测工程配置
默认检测所有 API
set_lanuages("c91") -- typo
$ xmake check
./xmake.lua:15: warning: unknown language value 'c91', it may be 'c90'
0 notes, 1 warnings, 0 errors
默认也可以指定检测特定组:
$ xmake check api
$ xmake check api.target
显示详细输出
这会额外提供 note 级别的检测信息。
$ xmake check -v
./xmake.lua:15: warning: unknown language value 'cxx91', it may be 'cxx98'
./src/tbox/xmake.lua:43: note: unknown package value 'mbedtls'
./src/tbox/xmake.lua:43: note: unknown package value 'polarssl'
./src/tbox/xmake.lua:43: note: unknown package value 'openssl'
./src/tbox/xmake.lua:43: note: unknown package value 'pcre2'
./src/tbox/xmake.lua:43: note: unknown package value 'pcre'
./src/tbox/xmake.lua:43: note: unknown package value 'zlib'
./src/tbox/xmake.lua:43: note: unknown package value 'mysql'
./src/tbox/xmake.lua:43: note: unknown package value 'sqlite3'
8 notes, 1 warnings, 0 errors
检测指定的 API
$ xmake check api.target.languages
./xmake.lua:15: warning: unknown language value 'cxx91', it may be 'cxx98'
0 notes, 1 warnings, 0 errors
检测编译 flags
$ xmake check
./xmake.lua:10: warning: clang: unknown c compiler flag '-Ox'
0 notes, 1 warnings, 0 errors
检测 includedirs
除了 includedirs,还有 linkdirs 等路径都会去检测。
$ xmake check
./xmake.lua:11: warning: includedir 'xxx' not found
0 notes, 1 warnings, 0 errors
检测工程代码(clang-tidy)
显示 clang-tidy 检测列表
$ xmake check clang.tidy --list
Enabled checks:
    clang-analyzer-apiModeling.StdCLibraryFunctions
    clang-analyzer-apiModeling.TrustNonnull
    clang-analyzer-apiModeling.google.GTest
    clang-analyzer-apiModeling.llvm.CastValue
    clang-analyzer-apiModeling.llvm.ReturnValue
    ...
检测所有 targets 中的源码
$ xmake check clang.tidy
1 error generated.
Error while processing /private/tmp/test2/src/main.cpp.
/tmp/test2/src/main.cpp:1:10: error: 'iostr' file not found [clang-diagnostic-error]
#include
         ^~~~~~~
Found compiler error(s).
error: execv(/usr/local/opt/llvm/bin/clang-tidy -p compile_commands.json /private/tmp/test2/src
/main.cpp) failed(1)
指定检测类型
我们可以在 --check= 中指定需要检测的类型,具体用法可以参考 clang-tidy 的 --check= 参数,完全一致的。
$ xmake check clang.tidy --checks="*"
6 warnings and 1 error generated.
Error while processing /private/tmp/test2/src/main.cpp.
/tmp/test2/src/main.cpp:1:10: error: 'iostr' file not found [clang-diagnostic-error]
#include
         ^~~~~~~
/tmp/test2/src/main.cpp:3:1: warning: do not use namespace using-directives; use using-declarat
ions instead [google-build-using-namespace]
using namespace std;
^
/tmp/test2/src/main.cpp:3:17: warning: declaration must be declared within the '__llvm_libc' na
mespace [llvmlibc-implementation-in-namespace]
using namespace std;
                ^
/tmp/test2/src/main.cpp:5:5: warning: declaration must be declared within the '__llvm_libc' nam
espace [llvmlibc-implementation-in-namespace]
int main(int argc, char **argv) {
    ^
/tmp/test2/src/main.cpp:5:5: warning: use a trailing return type for this function [modernize-u
se-trailing-return-type]
int main(int argc, char **argv) {
~~~ ^
auto                            -> int
/tmp/test2/src/main.cpp:5:14: warning: parameter 'argc' is unused [misc-unused-parameters]
int main(int argc, char **argv) {
             ^~~~
              /*argc*/
/tmp/test2/src/main.cpp:5:27: warning: parameter 'argv' is unused [misc-unused-parameters]
int main(int argc, char **argv) {
                          ^~~~
                           /*argv*/
Found compiler error(s).
error: execv(/usr/local/opt/llvm/bin/clang-tidy --checks=* -p compile_commands.json /private/tm
p/test2/src/main.cpp) failed(1)
检测指定 target 的代码
$ xmake check clang.tidy [targetname]
检测给定的源文件列表
$ xmake check clang.tidy -f src/main.c
$ xmake check clang.tidy -f 'src/*.c:src/**.cpp'
设置 .clang-tidy 配置文件
$ xmake check clang.tidy --configfile=/tmp/.clang-tidy
创建 .clang-tidy 配置文件
$ xmake check clang.tidy --checks="*" --create
$ cat .clang-tidy
---
Checks:          'clang-diagnostic-*,clang-analyzer-*,*'
WarningsAsErrors: ''
HeaderFilterRegex: ''
AnalyzeTemporaryDtors: false
FormatStyle:     none
User:            ruki
CheckOptions:
  - key:             readability-suspicious-call-argument.PrefixSimilarAbove
    value:           '30'
  - key:             cppcoreguidelines-no-malloc.Reallocations
    value:           '::realloc'
自动修复错误代码
我们可以使用下面的命令参数,自动修复 clang tidy 检测出来的问题代码。
$ xmake check clang.tidy --fix
$ xmake check clang.tidy --fix_errors
$ xmake check clang.tidy --fix_notes
生成安装包 (XPack)
简介
这个插件可以帮助用户快速生成不同平台的安装包,源码包,它会生成下面一些安装包格式:
- Windows NSIS 二进制安装包
- Windows WIX 二进制安装包
- runself (shell) 自编译安装包
- zip/tar.gz 二进制包
- zip/tar.gz 源码包
- RPM 二进制安装包
- SRPM 源码安装包
- DEB 二进制安装包
下面是一个完整例子,我们可以先简单看下:
set_version("1.0.0")
add_rules("mode.debug", "mode.release")

includes("@builtin/xpack")

target("test")
    set_kind("binary")
    add_files("src/*.cpp")

xpack("test")
    set_formats("nsis", "zip", "targz", "runself")
    set_title("hello")
    set_author("ruki")
    set_description("A test installer.")
    set_homepage("https://xmake.io")
    set_licensefile("LICENSE.md")
    add_targets("test")
    add_installfiles("src/(assets/*.png)", {prefixdir = "images"})
    add_sourcefiles("(src/**)")
    set_iconfile("src/assets/xmake.ico")

    after_installcmd(function (package, batchcmds)
        batchcmds:mkdir(package:installdir("resources"))
        batchcmds:cp("src/assets/*.txt", package:installdir("resources"), {rootdir = "src"})
        batchcmds:mkdir(package:installdir("stub"))
    end)

    after_uninstallcmd(function (package, batchcmds)
        batchcmds:rmdir(package:installdir("resources"))
        batchcmds:rmdir(package:installdir("stub"))
    end)
我们通过 includes("@builtin/xpack") 引入 xpack 的所有配置接口,包括 xpack 配置域,以及它的所有域接口。
然后我们执行:
$ xmake pack
即可生成所有安装包。
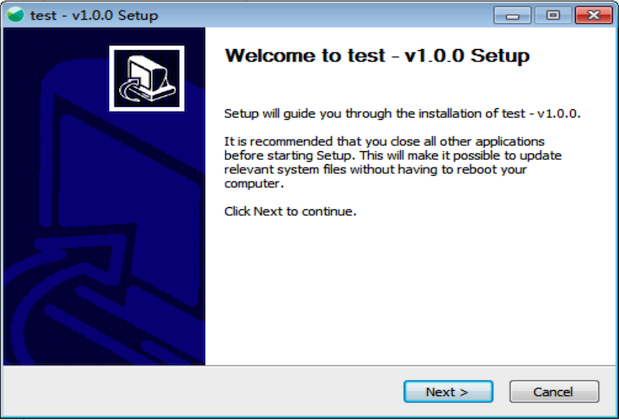
生成 NSIS 安装包
只要配置了 set_formats("nsis") 格式,然后执行 xmake pack 命令,就能生成 NSIS 格式的安装包。
另外,xmake 还会自动安装生成 NSIS 包所需的工具,实现真正的一键打包。
$ xmake pack
note: install or modify (m) these packages (pass -y to skip confirm)?
in xmake-repo:
  -> nsis 3.09
please input: y (y/n/m)

  => install nsis 3.09 .. ok

[ 25%]: compiling.release src\main.cpp
[ 37%]: compiling.release src\main.cpp
[ 50%]: linking.release foo.dll
[ 62%]: linking.release test.exe
packing build\xpack\test\test-windows-x64-v1.0.0.exe
pack ok
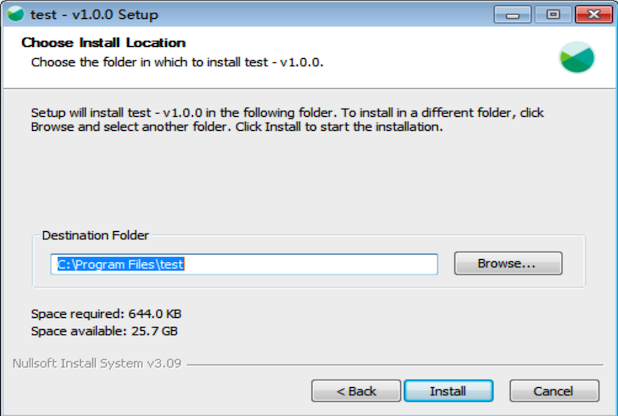
test-windows-x64-v1.0.0.exe 就是我们生成的安装包,双击运行它,就能安装我们的二进制文件到指定目录。
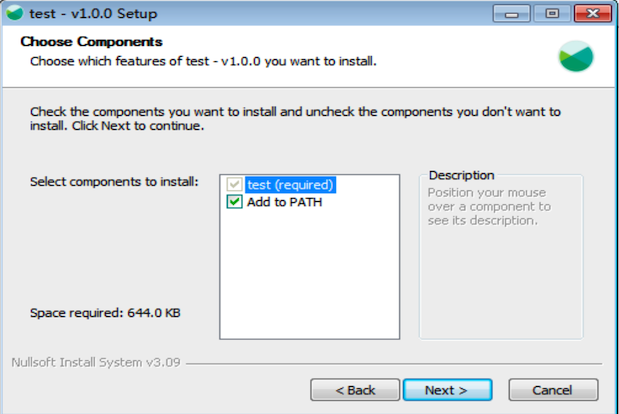
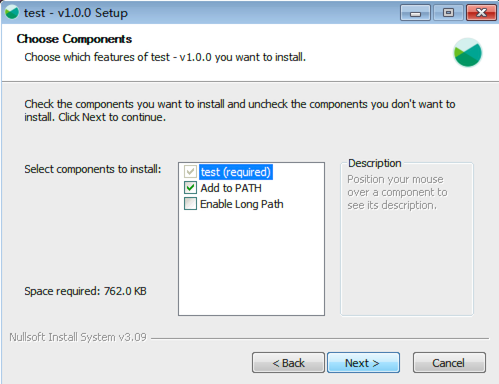
增加组件安装
我们还可以给 NSIS 增加组件安装命令,只有当用户选择指定组件的时候,它的安装命令才会被执行。
xpack("test")
    add_components("LongPath")

xpack_component("LongPath")
    set_default(false)
    set_title("Enable Long Path")
    set_description("Increases the maximum path length limit, up to 32,767 characters (before 256).")
    on_installcmd(function (component, batchcmds)
        batchcmds:rawcmd("nsis", [[
  ${If} $NoAdmin == "false"
    ; Enable long path
    WriteRegDWORD ${HKLM} "SYSTEM\CurrentControlSet\Control\FileSystem" "LongPathsEnabled" 1
  ${EndIf}]])
    end)
这个例子中,我们在里面添加了一个 NSIS 特有的自定义命令,去实现对长路径的支持。
生成自安装包
我们也可以生成基于 shell 脚本的自编译安装包。我们需要配置 runself 打包格式,然后通过 add_sourcefiles 添加需要参与编译安装的源文件。
接着,我们需要自定义 on_installcmd 安装脚本,里面去配置如果编译源码包,我们可以简单的调用一个内置的编译安装脚本文件,也可以直接配置 make install 等编译安装命令。
例如:
xpack("test")
    set_formats("runself")
    add_sourcefiles("(src/**)")
    on_installcmd(function (package, batchcmds)
        batchcmds:runv("make", {"install"})
    end)
然后,我们执行 xmake pack 命令,就可以生成一个自安装的 xxx.gz.run 包,默认采用 gzip 压缩。
$ xmake pack
packing build/xpack/test/test-macosx-src-v1.0.0.gz.run
pack ok
我们可以使用 sh 去加载运行它来安装我们的程序。
$ sh ./build/xpack/test/test-macosx-src-v1.0.0.gz.run
我们也可以看一个比较完整的例子:
xpack("xmakesrc")
    set_formats("runself")
    set_basename("xmake-v$(version)")
    set_prefixdir("xmake-$(version)")
    before_package(function (package)
        import("devel.git")

        local rootdir = path.join(os.tmpfile(package:basename()) .. ".dir", "repo")
        if not os.isdir(rootdir) then
            os.tryrm(rootdir)
            os.cp(path.directory(os.projectdir()), rootdir)

            git.clean({repodir = rootdir, force = true, all = true})
            git.reset({repodir = rootdir, hard = true})
            if os.isfile(path.join(rootdir, ".gitmodules")) then
                git.submodule.clean({repodir = rootdir, force = true, all = true})
                git.submodule.reset({repodir = rootdir, hard = true})
            end
        end

        local extraconf = {rootdir = rootdir}
        package:add("sourcefiles", path.join(rootdir, "core/**|src/pdcurses/**|src/luajit/**|src/tbox/tbox/src/demo/**"), extraconf)
        package:add("sourcefiles", path.join(rootdir, "xmake/**"), extraconf)
        package:add("sourcefiles", path.join(rootdir, "*.md"), extraconf)
        package:add("sourcefiles", path.join(rootdir, "configure"), extraconf)
        package:add("sourcefiles", path.join(rootdir, "scripts/*.sh"), extraconf)
        package:add("sourcefiles", path.join(rootdir, "scripts/man/**"), extraconf)
        package:add("sourcefiles", path.join(rootdir, "scripts/debian/**"), extraconf)
        package:add("sourcefiles", path.join(rootdir, "scripts/msys/**"), extraconf)
    end)

    on_installcmd(function (package, batchcmds)
        batchcmds:runv("./scripts/get.sh", {"__local__"})
    end)
它是 xmake 自身源码的安装包配置脚本,更完整的配置可以参考:xpack.lua
这里,它通过调用源码包内置的 ./scripts/get.sh 安装脚本去执行编译安装。
生成源码归档包
另外,我们也可以配置 srczip 和 srctargz 格式,来生成源码压缩包,它不是完整的安装包,也没有安装命令,仅仅用于源码包分发。
xpack("test")
    set_formats("srczip", "srctargz")
    add_sourcefiles("(src/**)")
$ xmake pack
packing build/xpack/test/test-macosx-src-v1.0.0.zip ..
packing build/xpack/test/test-macosx-src-v1.0.0.tar.gz ..
pack ok
生成二进制归档包
我们也可以配置 zip 和 targz 来生成二进制的压缩包,它会先自动编译所有绑定的 target 目标程序,将所有需要的二进制程序,库文件打包到 zip/tar.gz 格式。
这通常用于制作绿色版的安装包,内部不太任何自动安装脚本,用户需要自己设置 PATH 等环境变量。
xpack("test")
    set_formats("zip", "targz")
    add_installfiles("(src/**)")
$ xmake pack
packing build/xpack/test/test-macosx-v1.0.0.zip ..
packing build/xpack/test/test-macosx-v1.0.0.tar.gz ..
pack ok
!> 需要注意的是,打二进制文件到包里,使用的是 add_installfiles 而不是 add_sourcefiles。
我们也可以通过 add_targets 去绑定需要安装的 target 目标程序和库。更多详情见下面关于 add_targets 的接口描述。
生成 SRPM 源码安装包
它可以生成 .src.rpm 格式的源码安装包。
我们可以通过配置 add_targets 关联需要构建的目标,在生成的 srpm 包中,它会自动调用 xmake build 和 xmake install 去构建和安装包。
xpack("test")
    set_homepage("https://xmake.io")
    set_license("Apache-2.0")
    set_description("A cross-platform build utility based on Lua.")

    set_formats("srpm")
    add_sourcefiles("(src/**)")
    add_sourcefiles("./xmake.lua")

    add_targets("demo")
它会生成类似下面的 spec 文件,然后自动调用 rpmbuild 去生成 .src.rpm 包。
Name:       test
Version:    1.0.0
Release:    1%{?dist}
Summary:    hello

License:    Apache-2.0
URL:        https://xmake.io
Source0:    test-linux-src-v1.0.0.tar.gz

BuildRequires: xmake
BuildRequires: gcc
BuildRequires: gcc-c++

%description
A test installer.

%prep
%autosetup -n test-1.0.0 -p1

%build
xmake build -y test

%install
xmake install -o %{buildroot}/%{_exec_prefix} test
cd %{buildroot}
find . -type f | sed 's!^\./!/!' > %{_builddir}/_installedfiles.txt

%check

%files -f %{_builddir}/_installedfiles.txt

%changelog
* Fri Dec 22 2023 ruki - 1.0.0-1
- Update to 1.0.0
我们也可以通过 on_buildcmd 和 on_installcmd 自定义构建和安装脚本。
xpack("test")
    set_homepage("https://xmake.io")
    set_license("Apache-2.0")
    set_description("A cross-platform build utility based on Lua.")

    set_formats("srpm")
    add_sourcefiles("(src/**)")
    add_sourcefiles("./configure")

    on_buildcmd(function (package, batchcmds)
        batchcmds:runv("./configure")
        batchcmds:runv("make")
    end)

    on_installcmd(function (package, batchcmds)
        batchcmds:runv("make", {"install", "PREFIX=%{buildroot}"})
    end)
生成 RPM 二进制安装包
RPM 包将会直接生成编译好的二进制安装包。xmake 会自动调用 rpmbuild --rebuild 命令去构建 SRPM 包生成它。
而在 XPack 中,我们仅仅只需要配置 set_formats("rpm") 即可支持 rpm 包生成,其他配置与 srpm 包完全一致。
xpack("test")
    set_formats("rpm")
    -- TODO
打包命令参数
指定打包格式
如果我们在配置文件中已经使用 set_formats 配置了多个打包格式,那么默认情况下,xmake pack 会自动生成所有这些格式的包。
当然,我们也可以通过 xmake pack --formats=nsis,targz 来选择性指定当前需要打哪些格式的包。
修改打包文件名
我们可以在配置文件中,通过 set_basename() 来修改包名,也可以通过命令行去修改它。
$ xmake pack --basename="foo"
packing build/xpack/test/foo.zip ..
pack ok
指定输出目录
默认的输出目录是在 build 目录下,但我们也可以修改输出的路径。
$ xmake pack -o /tmp/output
禁用自动构建
如果是打 NSIS 等二进制包,xmake pack 会先自动编译所有被绑定的 target 目标文件,然后再去执行打包逻辑。
但是如果我们已经编译过了,不想每次都去编译它,而是直接去打包,可以通过下面的参数禁用自动构建。
$ xmake pack --autobuild=n
接口描述
更多 XPack 打包接口描述见:XPack 打包接口文档。
宏记录和回放
简介
我们可以通过这个插件,快速记录和回放我们平常频繁使用到的一些xmake操作,来简化我们日常的开发工作。
它提供了一些功能:
- 手动记录和回放多条执行过的xmake命令
- 支持快速的匿名宏创建和回放
- 支持命名宏的长久记录和重用
- 支持宏脚本的批量导入和导出
- 支持宏脚本的删除、显示等管理功能
- 支持自定义高级宏脚本,以及参数配置
记录操作
# 开始记录宏
$ xmake macro --begin

# 执行一些xmake命令
$ xmake f -p android --ndk=/xxx/ndk -a arm64-v8a
$ xmake p
$ xmake f -p mingw --sdk=/mingwsdk
$ xmake p
$ xmake f -p linux --sdk=/toolsdk --toolchains=/xxxx/bin
$ xmake p
$ xmake f -p iphoneos -a armv7
$ xmake p
$ xmake f -p iphoneos -a arm64
$ xmake p
$ xmake f -p iphoneos -a armv7s
$ xmake p
$ xmake f -p iphoneos -a i386
$ xmake p
$ xmake f -p iphoneos -a x86_64
$ xmake p

# 结束宏记录,这里不设置宏名字,所以记录的是一个匿名宏
xmake macro --end
回放
# 回放一个匿名宏
$ xmake macro .
命名宏
匿名宏的好处就是快速记录,快速回放,如果需要长久保存,就需要给宏取个名字。
$ xmake macro --begin
$ ...
$ xmake macro --end macroname
$ xmake macro macroname
导入导出宏
导入指定的宏脚本或者宏目录:
$ xmake macro --import=/xxx/macro.lua macroname
$ xmake macro --import=/xxx/macrodir
导出指定的宏到脚本或者目录:
$ xmake macro --export=/xxx/macro.lua macroname
$ xmake macro --export=/xxx/macrodir
列举显示宏
列举所有xmake内置的宏脚本:
$ xmake macro --list
显示指定的宏脚本内容:
$ xmake macro --show macroname
自定义宏脚本
我们也可以自己编写个宏脚本 macro.lua 然后导入到xmake中去。
function main()
    os.exec("xmake f -p android --ndk=/xxx/ndk -a arm64-v8a")
    os.exec("xmake p")
    os.exec("xmake f -p mingw --sdk=/mingwsdk")
    os.exec("xmake p")
    os.exec("xmake f -p linux --sdk=/toolsdk --toolchains=/xxxx/bin")
    os.exec("xmake p")
    os.exec("xmake f -p iphoneos -a armv7")
    os.exec("xmake p")
    os.exec("xmake f -p iphoneos -a arm64")
    os.exec("xmake p")
    os.exec("xmake f -p iphoneos -a armv7s")
    os.exec("xmake p")
    os.exec("xmake f -p iphoneos -a i386")
    os.exec("xmake p")
    os.exec("xmake f -p iphoneos -a x86_64")
    os.exec("xmake p")
end
导入到xmake,并且定义宏名字:
$ xmake macro --import=/xxx/macro.lua [macroname]
回放这个宏脚本:
$ xmake macro [.|macroname]
内置的宏脚本
XMake 提供了一些内置的宏脚本,来简化我们的日常开发工作。
例如,我们可以使用 package 宏来对iphoneos平台的所有架构,一次性批量构建和打包:
$ xmake macro package -p iphoneos
高级的宏脚本编写
以上面提到的package宏为例,我们看下其具体代码,里面通过import导入一些扩展模块,实现了复杂的脚本操作。
-- imports
import("core.base.option")
import("core.project.config")
import("core.project.project")
import("core.platform.platform")

-- the options
local options =
{
    {'p', "plat",       "kv",  os.host(),   "Set the platform."                                    }
,   {'f', "config",     "kv",  nil,         "Pass the config arguments to \"xmake config\" .."     }
,   {'o', "outputdir",  "kv",  nil,         "Set the output directory of the package."             }
}

-- package all
--
-- .e.g
-- xmake m package
-- xmake m package -f "-m debug"
-- xmake m package -p linux
-- xmake m package -p iphoneos -f "-m debug --xxx ..." -o /tmp/xxx
-- xmake m package -f \"--mode=debug\"
--
function main(argv)

    -- parse arguments
    local args = option.parse(argv, options, "Package all architectures for the given the platform."
                                           , ""
                                           , "Usage: xmake macro package [options]")

    -- package all archs
    local plat = args.plat
    for _, arch in ipairs(platform.archs(plat)) do

        -- config it
        os.exec("xmake f -p %s -a %s %s -c %s", plat, arch, args.config or "", (option.get("verbose") and "-v" or ""))

        -- package it
        if args.outputdir then
            os.exec("xmake p -o %s %s", args.outputdir, (option.get("verbose") and "-v" or ""))
        else
            os.exec("xmake p %s", (option.get("verbose") and "-v" or ""))
        end
    end

    -- package universal for iphoneos, watchos ...
    if plat == "iphoneos" or plat == "watchos" then

        -- load configure
        config.load()

        -- load project
        project.load()

        -- enter the project directory
        os.cd(project.directory())

        -- the outputdir directory
        local outputdir = args.outputdir or config.get("buildir")

        -- package all targets
        for _, target in pairs(project.targets()) do

            -- get all modes
            local modedirs = os.match(format("%s/%s.pkg/lib/*", outputdir, target:name()), true)
            for _, modedir in ipairs(modedirs) do

                -- get mode
                local mode = path.basename(modedir)

                -- make lipo arguments
                local lipoargs = nil
                for _, arch in ipairs(platform.archs(plat)) do
                    local archfile = format("%s/%s.pkg/lib/%s/%s/%s/%s", outputdir, target:name(), mode, plat, arch, path.filename(target:targetfile()))
                    if os.isfile(archfile) then
                        lipoargs = format("%s -arch %s %s", lipoargs or "", arch, archfile)
                    end
                end
                if lipoargs then

                    -- make full lipo arguments
                    lipoargs = format("-create %s -output %s/%s.pkg/lib/%s/%s/universal/%s", lipoargs, outputdir, target:name(), mode, plat, path.filename(target:targetfile()))

                    -- make universal directory
                    os.mkdir(format("%s/%s.pkg/lib/%s/%s/universal", outputdir, target:name(), mode, plat))

                    -- package all archs
                    os.execv("xmake", {"l", "lipo", lipoargs})
                end
            end
        end
    end
end
!> 如果你想要获取更多宏参数选项信息,请运行: xmake macro --help
生成doxygen文档
请先确保本机已安装doxygen工具,然后在工程目录下运行:
$ xmake doxygen